
Ready for an adventure? Anything that should be easy usually isn’t, especially when it comes to computers and hardware.
A new computer is expected to result in a boost to productivity … but only after the dust settles. Why is there always so much dust?
The first step is setting up the hardware. I thought it would be easy to add a 240GB Solid State Drive (SSD) to my new computer to become the boot drive to contain the Operating System and program files, and use the 2 TB drive it came with as the data drive. After all, I did buy a kit to make it easy.
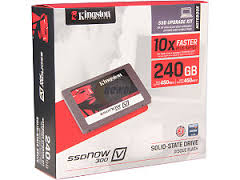
A Solid State Drive is made of memory like those in USB pens or SD cards for cameras. It has no moving parts and is about 10 times faster than a standard hard drive. Prices have come down and SSD sizes have increased so that it is now worthwhile and possible to set up an SSD drive as your boot drive. This kit cost $260 but I got it on sale for $160. It is one of the best ways to improve computer performance. Few computers come this way yet. Maybe in a few years.
So this is what happened:
First I had to physically install the SSD drive into my computer. This was difficult as there was no obvious place to secure the 3.5 inch tray that came with the 2.5 inch SSD. The video instructions showed mounting brackets, not a tray. The mounting brackets would have worked. Eventually, I found that I could slide the tray in place and use 2 screws to jam it into the frame so that it would be secure. That would be fine with not too much to worry about since the SSD doesn’t vibrate and gives off little heat.
Between getting my knobby fingers into the case and fiddling my way around, it only took 4 or 5 hours before I settled on that final solution. Only two minor cuts with slight bleeding.
Setting up the SSD required installing the installed Windows 8.1 operating system that was on the hard drive onto the SSD. They provide a bootable Acronis True Image software to do this. The tricky part was figuring out how to boot from the DVD with Windows 8.1. I tried going into the BIOS and changing it so that USB DVD was the first item. I did not realize at the time that it had to be a USB connected DVD (which I do not have) and not the DVD in the Desktop itself. So the second method I tried was in Windows 8.1 to access the Charm -> Settings -> Change PC Settings -> Update and Recovery -> Recovery -> Advanced startup -> Restart Now –> Use a device –> USB Floppy/CD. Of course that didn’t work either.
Well the whole point was to clone the disk. I found a free program: AOMEI Partition Assistant Standard Edition. I had to copy 4 partitions, one by one, but it knew it was an SSD and asked if I wanted to optimize for it, which I did. I set the BIOS to boot up off the SSD. When that rebooted, it asked me the Windows 8.1 first time startup questions again. But after some investigation, I realized it didn’t boot up off of the SSD at all, but still was booting up off the hard drive. I tried a number of things but decided to wait until the next morning to call Kingston Tech Support 1-877-546-4786 Mon - Fri, 6 am to 6 pm PT.
Kingston Tech told me that Windows 8.1 boots in UEFI mode meaning it can only boot from selected devices, and the computer’s DVD drive is not one of them. I would have to change to Legacy BIOS-compatibility mode to do that. I would have tried this, but after I got off the phone with them, there were all sorts of warnings in the BIOS of the consequences of going back to Legacy mode. So I didn’t try that.
The second thing Kingston Tech told me was once the drive is cloned, you have to disconnect the internal hard drive before the OS will make it the boot drive. That was the key thing that none of the other instructions anywhere told me. They also recommended Macrium Reflect to do the cloning which has a 30 day free trial and said it would do a better job to clone the main drive to the SSD.
So that’s what I did. This is something relatively simple but you’ve got to be quite meticulous to do it right. Then in the BIOS, I switched the boot drive to the SSD and disconnected the other drive. The machine started up and set the SSD as the boot drive. We are now at hour 12.
I reconnected the Sata cable for the other drive, but switched Sata positions so that the SSD would appear as Disk 0 and the other drive as Disk 1.
To clean up the old drive, I went into Windows Disk Management, but it wouldn’t allow me many operations on the old drive. Initially it looked like a bug because a right-click would only bring up a partial menu box with only “Help” visible. I tried the Macrium Reflect and AOMEI as well but they wouldn’t do it either. It seemed that HP must have protected the partitions of the hard drive. After some Google research, I found “How to delete a protected EFI disk partition with Windows 7 or 8″ from http://www.winability.com/delete-protected-efi-disk-partition/ and it showed me how to completely clean the drive, after which I could reformat it as one big data drive that would be my D: drive.
There. 16 hours of work later and its done. That was easy, wasn’t it? Probably only 100 steps to do this, but I tried 1,000 steps before I got to the right 100 in the right order.
If you get the least bit frustrated with trying to get computers working, then I would suggest that you don’t try this yourself. I had all weekend and from past experience I was expecting this.
Now I’m a bit closer to getting the new computer set up. I’ll still have to copy all my data over, install all my programs again, customize it the way I like it, and learn some of the nuances of Windows 8.1 so that I’ll be efficient at it.